
A Guide to Using Snowfoot Snowshoes
Start your adventure on the right foot — or the left. That part doesn’t matter. What does matter is wearing your Snowfoot correctly so you can step confidently toward your destination.
If you’re looking for instructions on how to properly wear your new Snowfoot snowshoes, you’re in the right place.
Step 1
How to Size & Fit Snowfoot to Your Boot
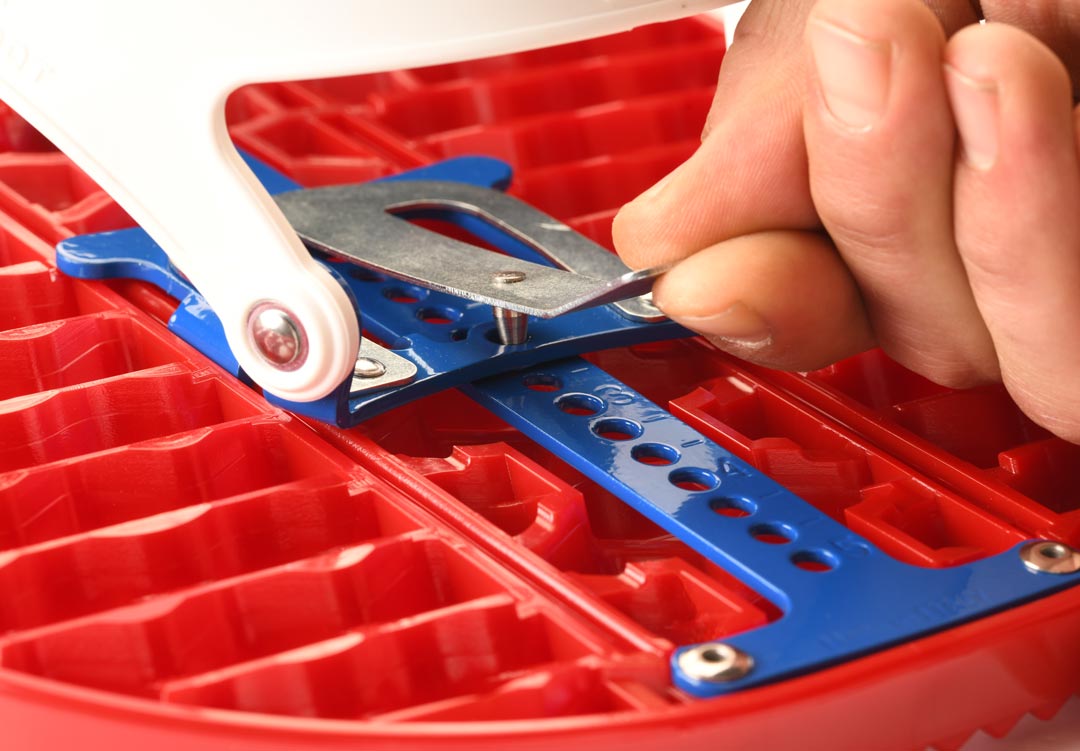
The first step is adjusting the heel to fit the length of your boot. To do this, lift the flat lever to raise the pin above the holes on the T-bar, allowing you to reposition the crampon.
Place the toe of your boot against the front binding attachment points, then adjust the rear heel piece forward or backward. The goal is to position the rear binding as close to your heel as possible without extending under the boot.
Snowfoot Fitting Tips:
- If your boot has a large rubber heel, moving the heel piece back one hole on the T-bar may improve comfort.
- Use the reference numbers on the T-bar to ensure both snowshoes are adjusted to the same setting.
Step 2
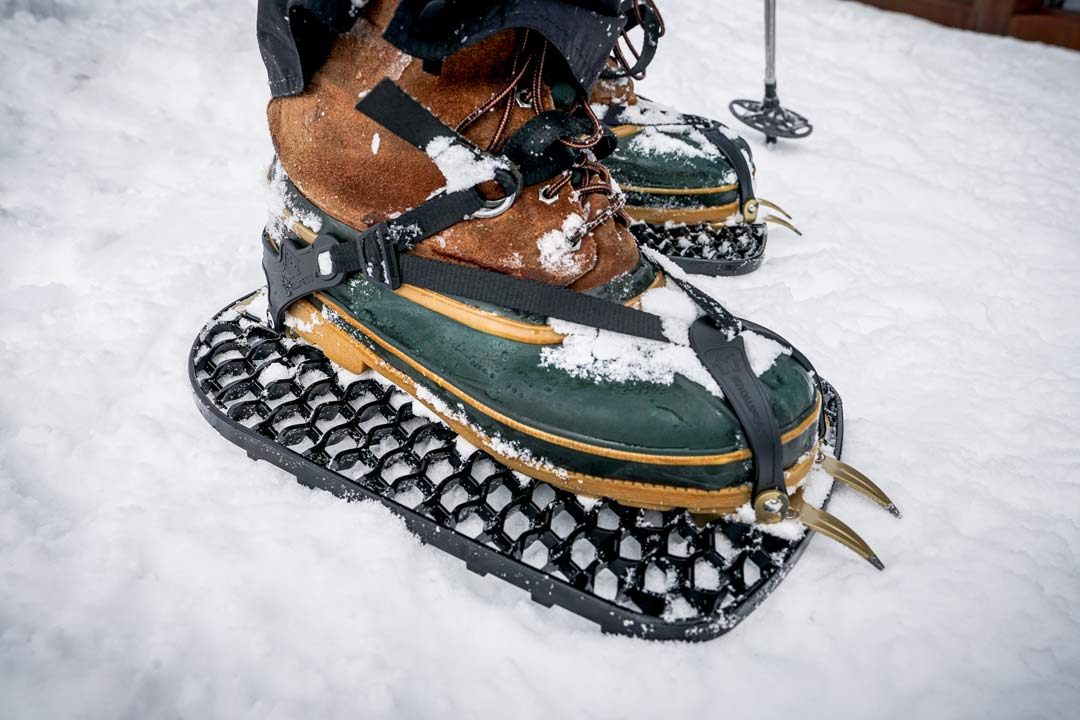
How to Lace & Secure Snowfoot

Next, lace the strap correctly through the double ring closure. Start at the rear where the rings are located and follow this sequence:
1) Pass the strap through the front binding.
2) Thread it through the opposite side of the rear binding.
3) Bring it back across the top of the boot and through both closure rings.
4) Reverse direction and pass the strap back through the outer ring, preparing it to be tightened.
5) To close the system, double-back the lace through the closure rings.
6) To open the system and release the boot, pull the pull-tab ring toward the outside of the boot.
Snowfoot Lacing Tips:
- To differentiate left from right, ensure the closure rings are on the outside of your boot.
- Keep the strap flat against the boot. The color detail helps indicate proper lacing and reveals any twists.
- When threading the lace through the bindings, start from the inside (facing the boot) and move outward.
- Pro tip: After threading the strap through both closure rings, pinch the end to create a loop and pass it back through the top ring. This method makes tightening easier and helps manage excess strap length.
Step 3
How to Tighten the Strap
The final step is tightening the strap so the bindings securely hold your boot. The best technique involves three pulls:
First pull: Grab the strap where it exits the front binding and returns toward the heel. Pull it back to tighten the front binding over the toe. Use your other hand to press down on the strap above the front binding.
Second pull: Grip the strap where it crosses over the boot and pull it toward the closure rings. Remove your other hand from the front binding and apply pressure to the strap above the boot.
Final pull: Grab the strap’s end (after it has passed through the rings) and pull it toward the inside of your boot. The strap should now be snug from start to finish.
Snowfoot Tightening Tips:
- A tighter fit is better. If there’s too much slack, your boot may slip out of the binding.
- After walking a few steps, check the strap and bindings. Adjust as needed. If there’s too much space between the boot and the binding points, verify that the heel piece is correctly sized for your boot.

Still Need Help?
We’re here to answer your questions, no matter how small. Contact us today to talk with one of our team members.